Monday, February 26, 2007

Caribbean Pork & Black Beans

Straight out of the most recent issue of Good Housekeeping Magazine (March 2007) comes this citrusy & fragrant dish. Everything about this recipe spoke to me - I love pork tenderloin, lime, cumin, fresh cilantro, garlic... this dish has it all for me. And, even better, I had almost everything in the fridge and freezer. Almost. And that was fine, it gave me a day to go shopping for the rest while the tenderloin thawed. So off to Kroger I went, and picked up a couple of limes, along with the regular grocery list, including some more garlic and fresh cilantro (I was almost out of both). I also picked up some more oranges. they're surprisingly plentiful AND good for this time of year. I can usually find them, but not as good as they've been.

I ran into more good luck at Kroger, finding a nice bin of blood oranges (Moro variety) at a decent price (5 for $2) to use in this recipe. If you've never had a blood orange, you're really missing out. I first learned about them from "The Frugal Gourmet" (Jeff Smith) several years ago.
(above image from Trade Winds Fruit, Encinitas, CA)

(This one is mine, though...)

They've got a much sweeter flavor than the regular run-of-the-mill navel, but it's not sickly sweet. The wiki article describes them as having a hint of raspberry flavor and I definitely can taste that, but unlike that article states, these oranges were easy to peel (and only one seed in each!).

Though this dish is called "Caribbean Pork & Black Beans", this dish could easily be called "Caribbean Black Beans & Pork". It starts out with the prep of the pork with a rub of grated orange peel, salt pepper and cumin, then proceeds to the making of The Beans. I'm making a double batch of these beans next time. You will, too. Here's the details...

Caribbean Pork & Black Beans
The ingredients:
2 Navel Oranges ( I used the blood oranges...)
2 Limes
1 teaspoon ground cumin
Salt and ground black pepper
1 whole pork tenderloin, about 1 pound, trimmed
1 tablespoon olive oil
1 medium onion, chopped
3 cloves garlic, crushed with press (I crushed and minced mine)
1 can (15 to 19 ounces) black beans, rinsed and drained
¼ cup chicken broth
1/8 teaspoon crushed red pepper
½ cup packed fresh cilantro leaves, chopped
1 avocado, sliced (optional - well the original recipe says optional, but it's really a requirement...)

The directions:
From 1 orange, grate 1 teaspoon peel into a bowl and squeeze 1/3 cup juice into another bowl.
Cut remaining orange into 8 to 12 wedges and set them aside.
From limes, grate 1/2 teaspoon peel into a separate bowl (not with the grated orange peel) and squeeze 2 tablespoons juice.
In one bowl, combine the orange peel, cumin, 1/4 teaspoon salt, and 1/4 teaspoon pepper.

Prepare the pork:
Cut the pork tenderloin crosswise into 8 pieces, each about 1 1/4 inches thick.
Place pork, cut sides down, on sheet of plastic wrap and press with heel of hand to flatten them slightly, to about 1-inch thickness.
Rub both sides of pork rounds with cumin mixture. Let the pork stand while cooking beans.

Cooking the beans:
In nonstick 12-inch skillet, heat 1 teaspoon oil over medium heat until hot.
Add the onion and cook about 8 minutes or until golden, stirring frequently.
Add the garlic and cook 1 minute.
Add the beans, broth, crushed red pepper, orange juice, and lime peel and juice.
Heat to boiling over medium-high heat and cook until juices reduce slightly, about 2 minutes. Transfer beans to a bowl and cover them to keep them warm until the pork is cooked.

Cook the pork:
In same skillet you've looked the beans in, heat remaining 2 teaspoons oil over medium-high heat.
Add the pork pieces to the pan (be sure not to crowd them) and cook for 5 minutes or until well browned. Reduce the heat to medium and turn each piece over. Cook the pork 3 to 5 minutes longer or until browned on the outside and still slightly pink in the center.


Serve it up!
On each dish (this makes 4 servings) spoon some of the bean mixture onto a dinner plate .
Place the pork on bean mixture and sprinkle with it with the cilantro.
Arrange 2 or 3 orange wedges and some lime pieces, too, on each plate.
Add some avocado slices on the side.

Enjoy,
Lorence

Saturday, February 24, 2007

Goodbye, Wendy's #1


I read the news today, oh, boy...


OK, so it's not that dramatic, but I did read in the paper (The Columbus Detached) this morning that the original Wendy's restaurant, store #1, located at at 257 E. Broad Street in Downtown Columbus, would be closing this Friday, March 2, 2007.
According to the newspaper, Dave Thomas opened this restaurant on November 15, 1969 as Wendy’s Old Fashioned Hamburgers.

I've captured the story and posted it here (the original story probably won't be available online after a week or so...).
According to the story, this store hasn't been profitable since COSI moved from its downtown location directly across the street from Wendy's in 1999 and the required repair and renovation costs to the existing building are too high.

I've been to this Wendy's a number of times and it's a very interesting place, filled with memorabilia from Wendy's history, including the original drive-through sign, instructing people how to order - the drive through was a new thing back then...

I remember the first time I went there - it was in early mid-late July of 1986. I had just graduated from college a couple of weeks before and had traveled over from Dayton to apply for a job at some Columbus hospitals. After applying at St Anthony's (where I would eventually be hired), I stopped at this Wendy's for lunch. it was a pretty big splurge for me that day, since I was running a bit low on cash - after all, I needed a job! I think I had a chili (their hamburgers never quite agreed with me) and a Coke. I might have even sat at this very table...
It's one of the old fashioned kind they used to have that was supposed to look like ol'timey newspaper ads. Kitschy, yes, but that was Wendy! I have many other memories of Wendy's, since I used to work at the one near the now defunct/demolished Salem Mall in Dayton during college (Salem Mall death photos here...). Actually, I worked at McDonald's AND Wendy's at the same time for about 6 months. I would work at Wendy's during lunch , then after that shift I would change into my McDonald's uniform in the Wendy's bathroom, order and eat (usually a chili) in the Wendy's "dining room" -in my McDonald's uniform - then walk two storefronts over to work the night shift at McD's. And yes, I stunk awful by the time I got home...

So with all of these memories swimming in my head this morning, I decided to take Boogie downtown for lunch. We had several errands to run today, so I figured what the heck. He'd never been there, and I thought it would be fun for him to see the place before it was gone.
When we arrived and finally found a place to park a block and a half away, we discovered that that seemed to be the same thought half the people of Columbus had, too - the place was jammed packed and we waited among a genial and generally nostalgic crowd for about 40 minutes to to get our meal. I could hear many people telling stories of their first visits to Wendy's, their visits to this original store and past working experience at other Wendy's stores. It was a long wait, but kind of fun. Every one was looking at the memorabilia on the walls taking pictures and talking to each other.
(the original Wendy)

I guess a fun time was had by all. And the food wasn't bad either. Boog had a Kid's meal with chicken nuggets (way tastier then McD's) & I had the chicken sandwich which was quickly commandeered by my dining companion:


After our meal we still had 7 minutes left on our parking meter, better than a few of our fellow diners who received $20 meter violation tickets. It was odd, they didn't seem to care. Their last meal at the original Wendy's seemed more important.

I have other memories of Wendy's - Founder R. David Thomas was a hefty contributor to Children's Hospital and a huge advocate for adoption. His passing in 2002 was a very sad day for all involved in both endeavors.

So, we had our meal, had our experience, took our photos and went on our merry way, off to do the grocery shopping, then home to try to stay warm and play Lego with mommy... one more day to remember.

Enjoy,
Lorence

Saturday, February 17, 2007

Classic Stuffed Green Peppers


This is a recipe we've made for years, from our well worn 1985 Betty Crocker Cookbook, given to me by my sister for Christmas that year. You'd think after 20 years of making this recipe, I'd have it memorized, but right there on page 39, I've got the page corner turned in so I can find it easily. Once I get it opened and get started, it pretty much flows from my head, but I always seem to need to have the book to get started. And of course, I don't follow the book's recipe exactly. I use tomato soup (my wife's idea), I add oregano and basil, and use real garlic, eliminating the salt and garlic salt.

I NEVER use garlic salt - I don't even own any. If you've got it, throw it away ad start using the real thing. Just crush it a bit and mince it up. And for more Garlic ideas, checkout Garlicster, garlic recipes galore...

I start with 3 large green peppers. I try to find peppers with 4 lobes (look on the bottom and count...). They cut in half easier, more evenly and sit inthe pan better - more balanced. They also look better and that never hurts.
As for rhe beef, around these parts, it's impossible to find a package of ground beef that is just 1 pound. For some reason, the groceries package the meat in 1.3 pound packages now. This works out pretty well, though, especially given the size of the peppers in the stores these days.

ok, here's the recipe with my modifications:
Classic Stuffed Green Peppers
Ingredients:
3 large green peppers
1.3 pounds lean ground beef
1/4 cup chopped onion
1/2 cup Minute rice (dried pre-cooked rice)
1 small can (6 ounces) tomato sauce
1 12 oz can condensed tomato soup
3 cloves of garlic, minced
1 tablespoon Dry Oregano
1 tablespoon Dry Basil
3/4 cup shredded mozzarella cheese
A big bowl of ice water (to cool the peppers down after parboiling and before stuffing)

Directions:
Preheat the oven to 350°.
Cut the peppers in half from top to bottom, making 6 halves. (see the photo above)
Remove stem and seeds. This can be done easily by holding the pepper in the palm of your left hand (open end up) with the stem facing you. Place you right thumb on the stem and insert your right index and middle fingers into the pepper just behind the seed head. Pull up on the bottom of the seed head while gently pushing on the stem and the whole thing should come out cleanly. You can also precut the top of the stem area to make it even easier.
Once the stem and seeds are out, trim the membranes down.
Place the prepared peppers in a large pot of with enough boiling water to cover them for about 3 or 4 minutes. Remove the peppers from the boiling water and quickly immerse directly into the ice water to stop them from cooking.Brown the ground beef with the onion and garlic in a skillet and drain any excess fat.

Add the can of tomato soup, basil, oregano, and rice. Stir to blend well.

Line a baking dish (9x13) with foil.
Stuff each pepper with meat mixture and lay them in the lined baking dish.

Top each pepper with some tomato sauce.

Cover the baking dish with foil and bake in oven for 45 minutes.
After 45 minutes, uncover the baking dish and top the peppers with mozzarella. Put the dish back into the oven and bake a few minutes longer, until the cheese is nicely melted. I like to turn the oven to broil to just brown the cheese a bit, too.

On the side, a crusty sourdough with tomato butter never hurts. Last time we made this we also had a bottle of chianti (no liver or fava beans, thank you ...) that went along very well, too.

As always,
Enjoy,
Lorence

Thursday, January 18, 2007

Matthew's own Pizza Quesadilla

It's close to bedtime but Matthew's hungry...There's not much in the house to snack on, so he comes up with a tasty creation on his own, the Pizza Quesadilla. So simple, so easy. He picked all the ingredients and put it together himself. Take a look...

Ingredients:
A flour tortilla
some tomato sauce
shredded mozzeralla cheese
sliced pepperoni
dried oregano flakes
other "toppings", like black lives, hot pepper rings, thin sliced green pepper...

Ok, so far so good. Time for assembly now:

First, he smeared some sauce onto one side of the tortilla...
Then he sprinkled some shredded cheese onto the sauce...
Added some olive pieces...
Topped that with a generous helping of pepperoni slices...
sprinkled the whole setup with oregano...
And more cheese (you can't have too much, can you?).
Then fold it over in half...
And pop it inthe microwave for about 20 to 30 seconds (daddy did that part)...
Slice it up and eat it up!
Damn good! Well done, Boogie!

Enjoy, we did!
Lorence

Thursday, January 11, 2007

Kale Soup post updated - now with PHOTOS!


The Creamy White Bean Soup with Kale, Garlic and Sausage post from October, 2006 has been updated with photos, including a pretty complete visual step-by-step of this easy recipe.

I do have one hint/enhancement for it, too - throw a third can of beans into the pot and another cup of broth.

Yum...Tonight's was great.

Enjoy!
Lorence

Friday, December 29, 2006

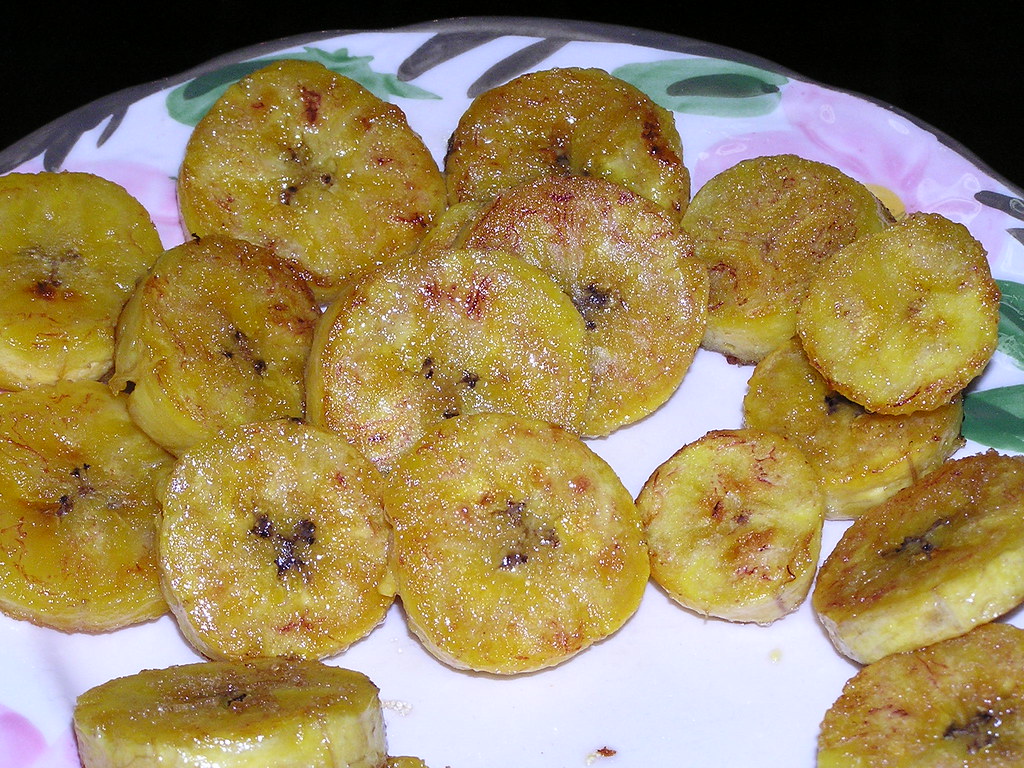
Brown Sugared Fried Plantains

The first time I had fried plantains was at Starliner Diner about 15 years ago as a side dish with the Media Noche sandwich.

(the funky inside of the Starliner Diner)
(Starliner's Fried Plantains)
(The above photo is by another Columbus food blogger, ColumbusFoodie. She has a great blog!)

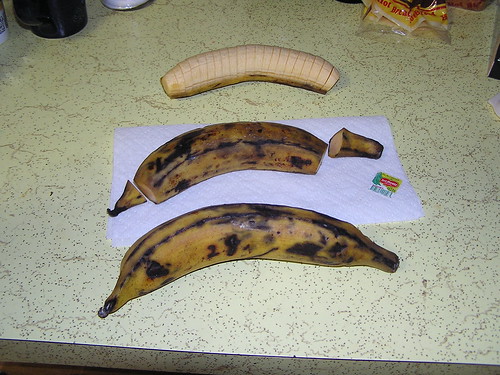
I had never even heard of plantains before and was surprised at the flavor. A few years later, I found them at the grocery store and decided to try to make something similar to Starliner's. Since I don't have a deep fryer, this proved to be quite a challenge, and one that I was just not up to. Nope, time to take a different tack. I search on-line and talked to some friends at work that were familiar with plantains. A coworker of Puerto Rican descent told me how to cook green plantains like a baked potato - I wasn't happy with the results, though - way too starchy for me. I was looking for the sweet flavor I'd had at Starliner, so I tried just pan frying some ripe yellow ones, then tried again with some that were much more ripe, almost all black. I've decided that somewhere in between is where I like them -yellow, at least with some black spots, heading towards black, and they shouldn't feel hard when squeezed. GourmetSleuth.com has a very nice graphic showing these stages, along with a good description of each stage and plantains in general (and some recipes, too).

If I can only find green plantains, I put them in a paper bag for a few days (or more) to ripen them up.

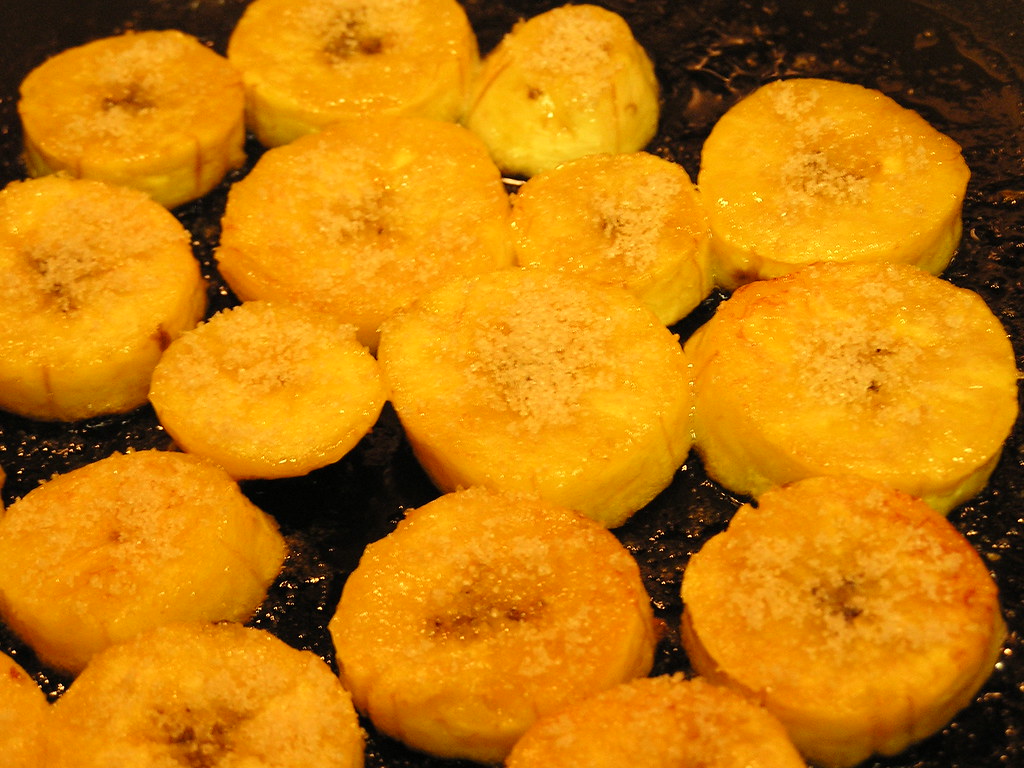
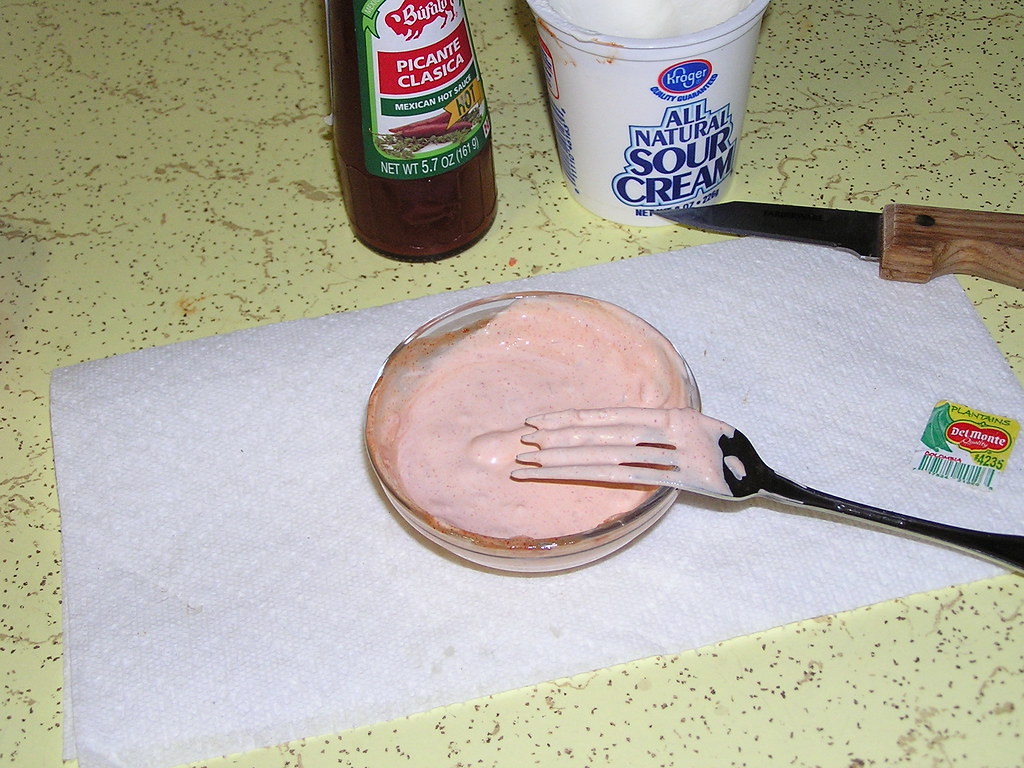
Making the fried plantains is pretty simple - peel, slice and pan fry in butter and oil, sprinkling some brown sugar at the end. I also like to serve the them with a sour cream and hot sauce dip.

Ingredients:
2 very ripe plantains (almost black , but not too squishy)
1 Tablespoon of butter
1 Tablespoon of oil (vegetable, corn, even olive works o.k.)
1 teaspoon of brown sugar
4 Tablespoons of sour cream
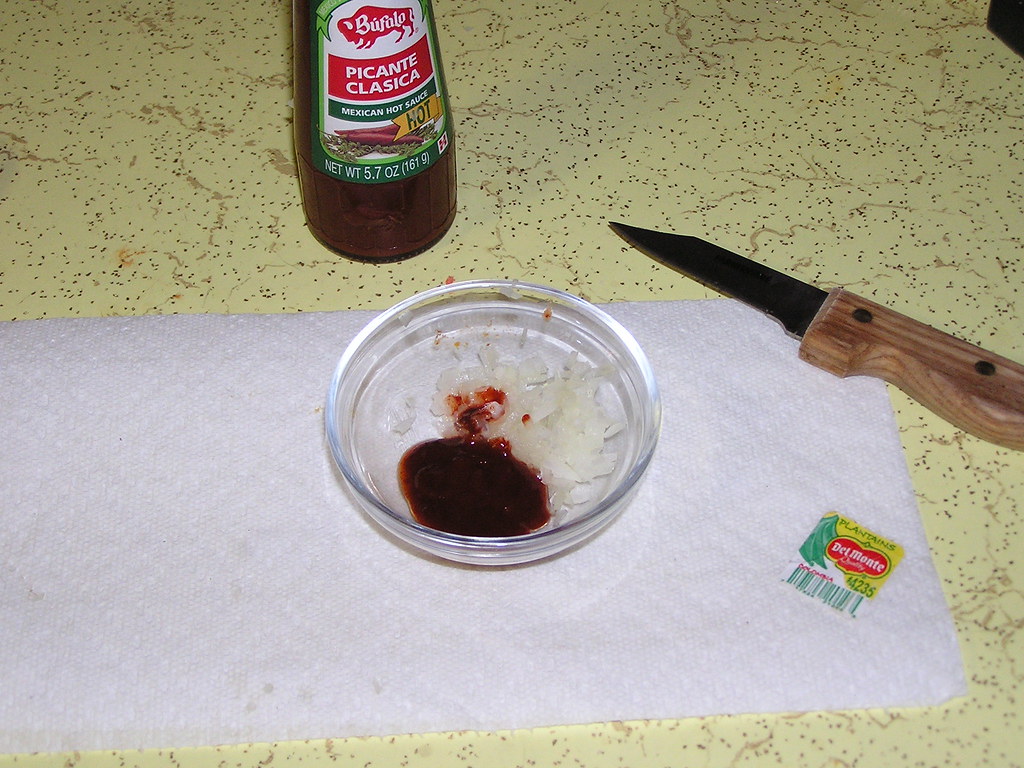
1 Tablespoon of finely minced onion
1 teaspoon of Mexican hot sauce, such as La Victoria Salsa Brava or Bufalo Picante Clasica

Directions:
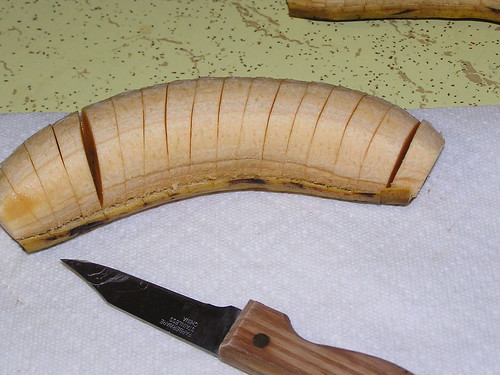
Peel and slice the plantains to about 3/8" thickness

ripe plantains ready for slicing & frying

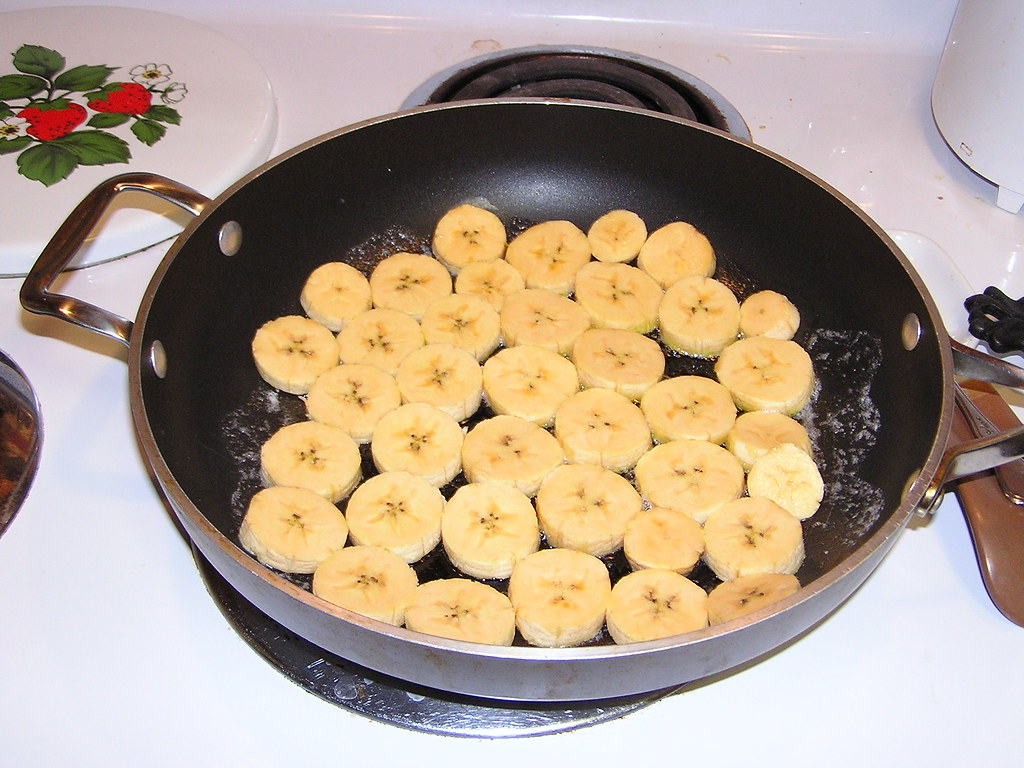
Sliced and ready to fry
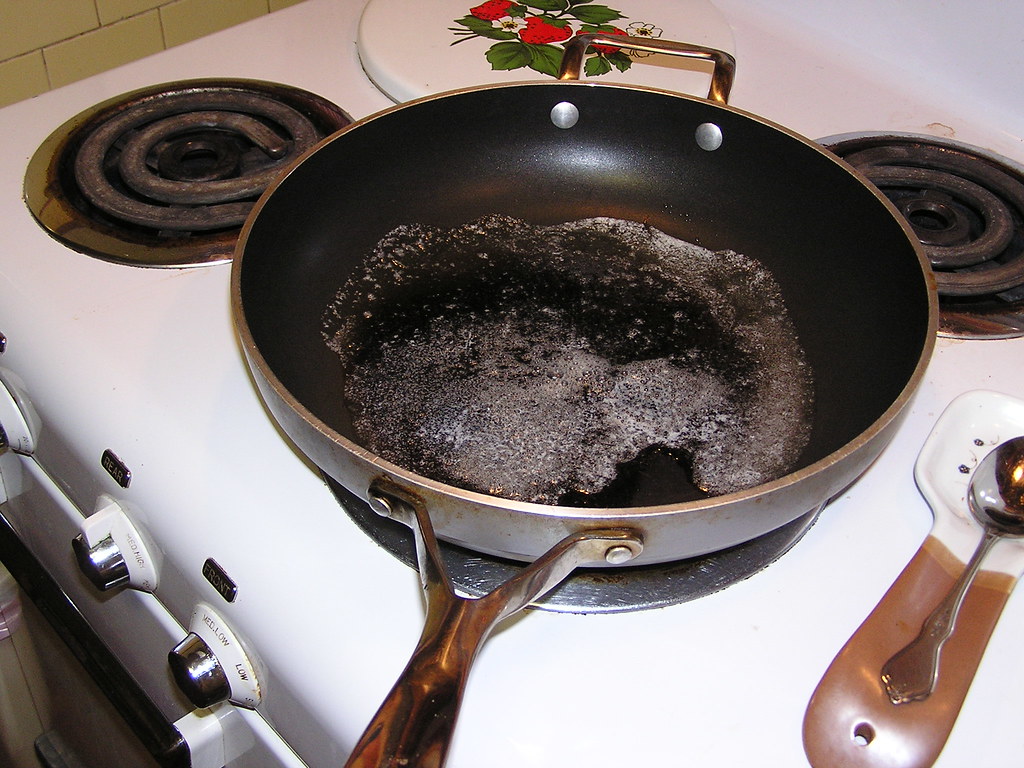
Heat a large frying pan over medium high heat. Add the butter and oil.


Add the sliced plantains to the hot grease, and lower the heat to medium low.


Cook until golden on the bottom, then flip them over and sprinkle them with the brown sugar.

Serve the plantains with the dipping sauce.

To make the dipping sauce:
Put the hot sauce and onion in a small bowl and add the sour cream. Blend well


Enjoy!
Lorence

Tuesday, December 19, 2006

Thanks, Lucy...

Saturday.

I suppose I wasn't really looking forward to Saturday, but the day passed uneventfully and I don't feel any different. At least not yet.

You see, I turned 45 on Saturday.

The day began well, as I opened up the morning paper and went to the part that I like best... The comics page. Yes, yes, I know we've got a mess in this world, what with the quagmire in Iraq and our leader in denial, not to mention the myriad of social injustices occurring on a daily basis in this country and around the world. I know that there is plenty of important stuff to read about. But My Saturday morning dose of semi-reality comes by way of the Columbus Dispatch, and, given the source, I head for the most real part first - the comics.

To my great surprise and intense pleasure, the Peanuts strip was actually VERY good on this personal milestone Saturday. First of all it was completely non-preachy. Second, it didn't involve a football, a baseball, or anyone insulting anyone else. And, for a third reason, the strip actually made me feel good for a change (Peanuts seldom does that for me. Sometimes I don't even read it).

Here it is - Click on it to for a larger version and see if you can figure out why I like this strip...


So he spelled my name wrong. It was close enough for a major smile from me.
Thanks, Lucy!

Enjoy!
I did.
Lorence

Thursday, December 14, 2006

Sausage Pasta with Goat Cheese


One of our favorite restaurant's here in Columbus is Figlio (actually, there are two of them in town and another in Dayton). They create the best pizzas (those great gourmet wood fired pizzas!), pastas that will spoil you for any other, and simple yet elegant salads. Their desserts (oh, the Chocolate Mousse...) and particularly their coffee are absolute standouts. I believe they use a custom blend created for them by Columus' own Stauf's Coffee Roasters and I've never had smoother coffee anywhere. It almost feels like I'm sipping liquid silk when I have cup there. Friends that know far more about wine than I do tell me their wine list, while not large or fancy, is a perfect match to the dishes coming out of the kitchen. The Owners of Figlio are no wine slackers, though, having recently opened Vino Vino - A Wine Bistro adjacent to the Grandview Figlio location. My wife has been there a few times and loves their crab cakes, too.

The decor at Figlio stresses their simple elegance, the only real wall decorations being some sort of seasonal fruit or vegetable hanging from what looks like thin metal wire, & always with one piece hanging higher than all the rest. the tables are covered with a bright white table cloth, then topped with butcher paper stamped sparingly with the Figlio logo. The superb waitstaff are all dressed in bright white shirts and black skirts or pants - the whole place just smacks of stylistic minimalism without being pretentious.

So, other than the obvious (Go to Figlio when you're in Columbus!), why am I telling you all of this? Well, in addition to the well deserved praise I've just heaped upon this place, Figlio is one of those artsy creative places that occasionally changes their menu items, adding new ones, taking some away...always with care to maintain a nice balance for their patrons. One dish they had many years back was a pasta (penne, I think) in a red sauce with sliced sauteed italian sausage and topped with goat cheese. My wife an I both enjoyed this dish (until she discovered their Chicken Diablo, her ever steady, one and only now), and I really wanted to be able to make something like it at home. My version of their pasta is the recipe below. It's nowhere near as good as Figlio's was, but we enjoy the flavors and have it often, especially since it's simple and quick.
Sausage Pasta with Goat Cheese
(Serves 4)
The Ingredients:
4 hot italian sausage links, sliced about 1/2 inch thick
3 cans (6 ounces) of tomato sauce (yep, just plain old small cans of sauce - we usually use the cheap stuff...)
1 pound of pasta, whatever kind you like. We use either thin spaghetti or penne
1/2 teaspoon dry oregano
1/2 teaspoon dry basil
Chevre Goat cheese, at least a tablespoon per serving, more if you really like the stuff. And you will really like the stuff..

The Directions:
Pour the tomato sauce into a medium sauce pan over low heat.
Add the sliced sausage, oregano & basil and cook on low for about 20 minutes, stirring occasionally. The flavor of the sausage will infuse into the sauce during this time.
After about 20 minutes, prepare the pasta per package label directions (If you are using fresh pasta, let the sauce cook a few more minutes since the pasta will be ready faster).
When the pasta is done, drain it well and portion it out into pasta bowls. Top the hot pasta with the sausage sauce and a generous dollop of goat cheese, then serve it while still steaming.

That's it. Like I said, it's nice and simple and quick, yet it will taste like you actually worked hard to make it.

Enjoy!
Lorence